
Implementing DHCP in Windows Server 2003
Mon, 12/03/2007 - 19:35 — Admin
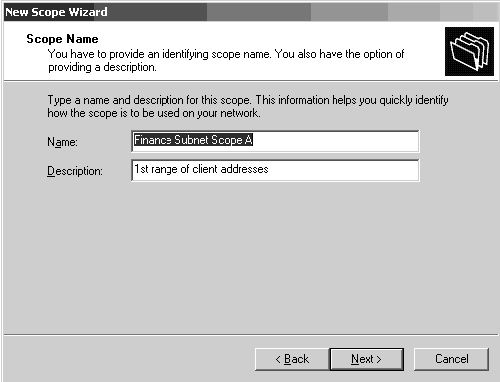
The first window asks for a Scope Name and Scope description. Enter them and click on next.
In this form entering the entire address range that this scope will be responsible for. My entry starts at 10 because I don't want the DHCP server trying to assign addresses for my network devices (router/domain controllers, etc) that have static addresses.
In this form you enter the IP Address within the range you entered in Step 2 that you do not want the DHCP server to assign. For my example I'm configuring half of the the addresses in my scope 192.168.226.11-254 to be assignable by this server and the other half from another server on the same subnet. dc1.texas.com will handle 192.168.226.11-133 and dc2.texas.com will handle 192.168.226.134-254. This way if one of the servers goes down clients will still be able to reserve addresses. The % of the split varies due to requiements of the specific environment.
In this step I left the default setting of 8 days. If I'm finding that my client pool is getting exhausted I can reduce the lease duration to free up more addresses.
This where you start entering the specific parameters you want the DHCP server to push out to the clients. For this I'm only configuring the default gateway, domain and domain name servers.
Enter the default gateway that clients will use to access outside resources.
This is actually a two-part step. If you were using the snap-in these would be 2 separate parameters. Enter your domain name and a DNS server.
I skipped this step because I don't have any WINS servers in my test lab. When you finish this step the wizard will give the option of activating the scope. I chose not to because I'm using VMWare as a DHCP Server. If you chose not to at this step, at some point you will need go to the DHCP snap-in, right click on the scope name and select activate.
Go to Administrative Tools -> DHCP to launch the DHCP snap-in.
Drill down to my.domain.com->your scope name->Scope Options, right click on Scope Options and select Configure Scope.
Scroll down until you see the option 006 DNS Servers. Enter an address for a second DNS Server to add it as a configuration parameter for this scope. In my case I can enter dc2.texas.com because and click on resolve to get the IP address.

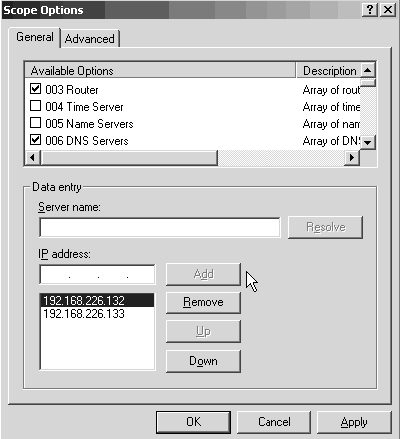
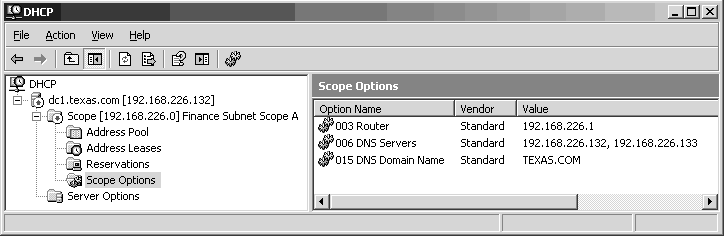
When you complete this step you should now see a second DNS Server IP Address under Scope Options.
Implementing DHCP in Windows Server 2003
There are at least 2 ways to install DHCP in Windows Server 2003. You can use the Managing Your Server Roles or Add/Remove Windows Components. Once the DHCP service is installed, you should get the configuring DHCP scope wizard. If you do not get the option for the wizard you may configure the scope by launching the DHCP snap-in and right clicking on yourdomain.com -> new scope.
Step 1: Scope Name
The first window asks for a Scope Name and Scope description. Enter them and click on next.
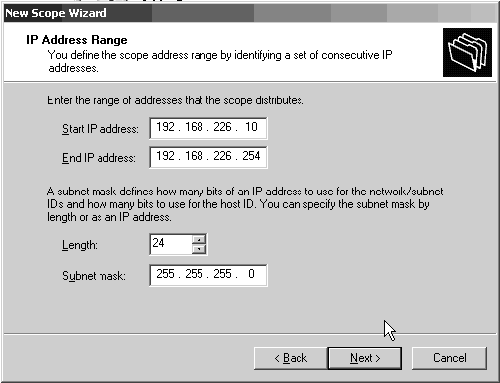
Step 2: IP Address Range
In this form entering the entire address range that this scope will be responsible for. My entry starts at 10 because I don't want the DHCP server trying to assign addresses for my network devices (router/domain controllers, etc) that have static addresses.
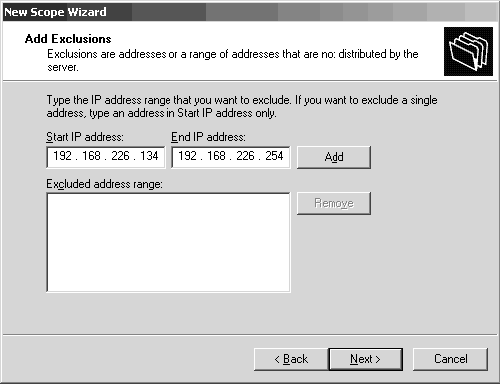
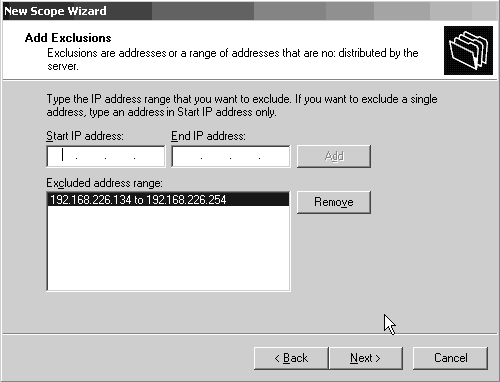
Step 3: Add Exclusions
In this form you enter the IP Address within the range you entered in Step 2 that you do not want the DHCP server to assign. For my example I'm configuring half of the the addresses in my scope 192.168.226.11-254 to be assignable by this server and the other half from another server on the same subnet. dc1.texas.com will handle 192.168.226.11-133 and dc2.texas.com will handle 192.168.226.134-254. This way if one of the servers goes down clients will still be able to reserve addresses. The % of the split varies due to requiements of the specific environment.
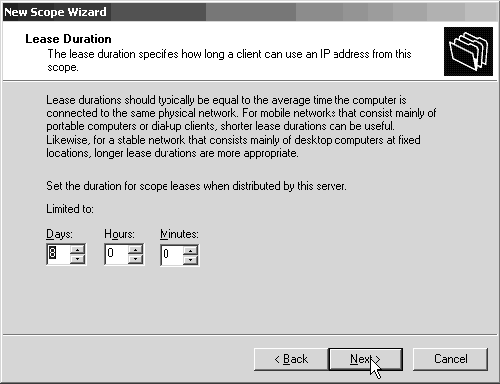
Step 4: Lease Duration
In this step I left the default setting of 8 days. If I'm finding that my client pool is getting exhausted I can reduce the lease duration to free up more addresses.
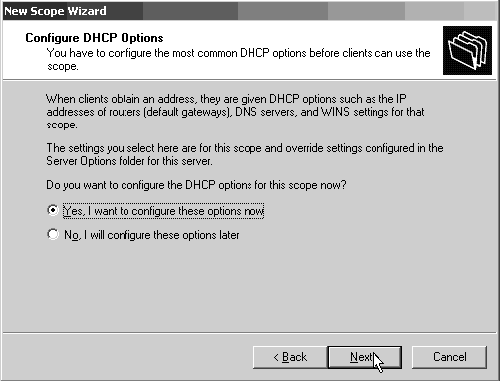
Step 5: Configure DHCP Scope Options
This where you start entering the specific parameters you want the DHCP server to push out to the clients. For this I'm only configuring the default gateway, domain and domain name servers.
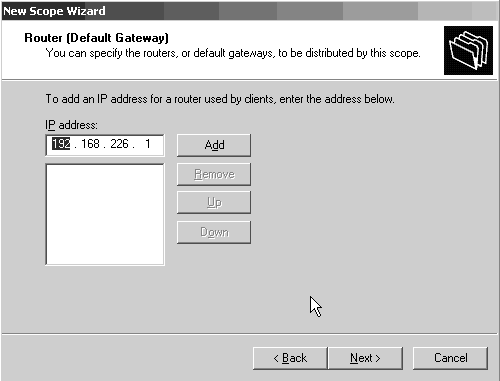
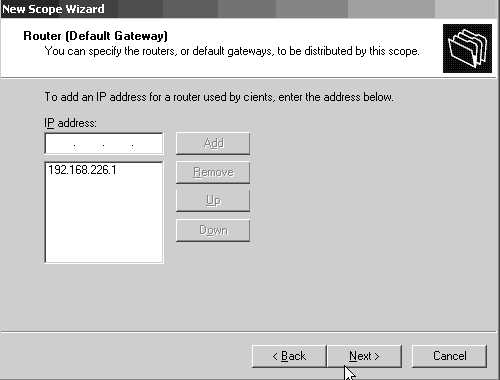
Step 6: Router / Default Gateway
Enter the default gateway that clients will use to access outside resources.
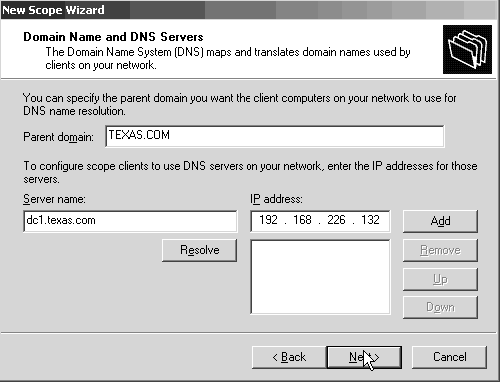
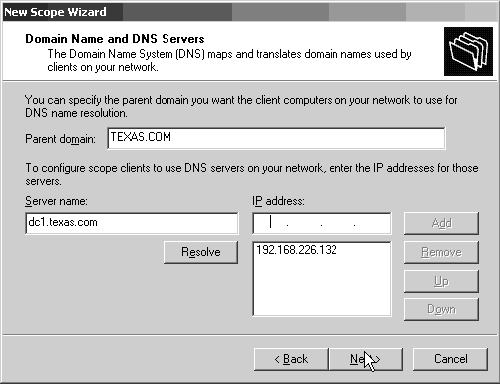
Step 7: Domain Name and DNS Servers
This is actually a two-part step. If you were using the snap-in these would be 2 separate parameters. Enter your domain name and a DNS server.
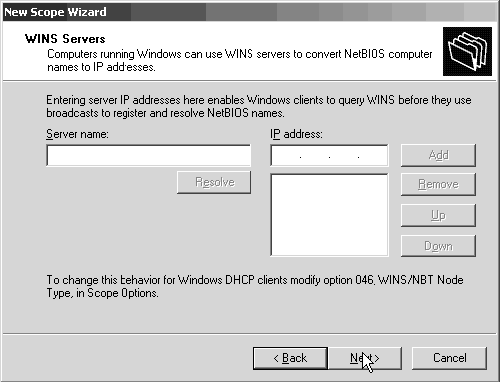
Step 8: Wins Servers
I skipped this step because I don't have any WINS servers in my test lab. When you finish this step the wizard will give the option of activating the scope. I chose not to because I'm using VMWare as a DHCP Server. If you chose not to at this step, at some point you will need go to the DHCP snap-in, right click on the scope name and select activate.
Step 9: Starting the DHCP Snap-In
Go to Administrative Tools -> DHCP to launch the DHCP snap-in.
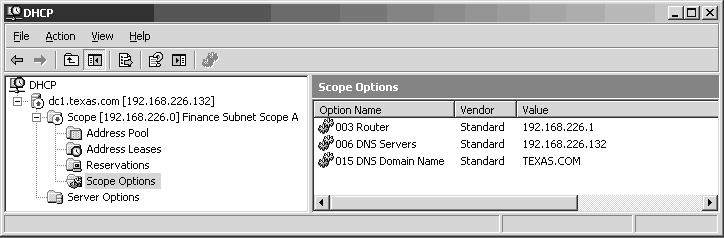
Step 10: Manually Configuring Scope Options
Drill down to my.domain.com->your scope name->Scope Options, right click on Scope Options and select Configure Scope.
Step 11: Adding Another DNS Server
Scroll down until you see the option 006 DNS Servers. Enter an address for a second DNS Server to add it as a configuration parameter for this scope. In my case I can enter dc2.texas.com because and click on resolve to get the IP address.
Step 12:
When you complete this step you should now see a second DNS Server IP Address under Scope Options.
There are many other parameters you can configure for DHCP. A detailed description of the options is available from the IETF, Request for Comments: 2132, DHCP Options and BOOTP Vendor Extensions.